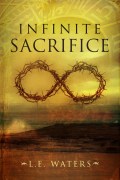
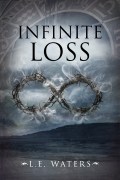
Wow! That was so much easier than I thought and I’m so pleased with the results. I’ve posted it up on my Book Trailer page and please let me know what you think!
Even though I’d been searching and collecting images for a bit before, the actual process of creating the video clip took me about a day and a half. I never used iMovie before so this was learning completely from scratch. I wanted to let everyone know exactly how I did this so anyone can create one themselves–and I’m no techy so seriously anyone can do this.
Step 1) First, I opened up a new project on iMovie and titled it. Then I downloaded all the images I collected free and some I purchased to iPhoto (not sure if there is a direct way to just download it to iMovie, but remember I’m figuring this all out on my own and this way worked). When I clicked on the camera icon on my iMovie page there was all the photos I wanted when I highlighted last months photos. I was able to just drag each photo to the desired placement of my new project.
Step 2) Once I got them all in the order I wanted I went to Kevin MacLeod’s website, searched the mood I wanted, and I sampled some fantastic choices. I knew immediately which song I wanted to go with and I downloaded it to my iMovie. I clicked on the musical note tab to drag the song to my project. The music shows up as an encompassing highlight around your pictures. It will go as long as you have pictures or when the song ends. I found I had to delete a few images to fit the song time (click on the clip and press delete).
Step 3) Now I tried it out with the music by hitting the play button. I realized I needed to change timing to get each image in time with the music. Each image gets a default time of 4 seconds so in order to change them you must click on the image until clip duration pops up and you can type in exactly how long you want the image to appear. If you want all the images that duration you check the box to apply to all clips, otherwise leave it unchecked to specify this one clip. I found I needed to tweak each time to fit perfectly with the music and this did take some time.
Step 4) When doing step 3 be careful not to be completely exact since you need to put some transitions between clips to make it all smooth. Next to the camera icon and the musical note icon is an icon for transitions. Click on that and you can highlight each option to display how the transition appears. I decided to use two different transitions to decipher between the lives and within the lives. I used a flash between the lives and the cross dissolve between the others. Drag the transition and place between the desired clip and click on it to set the timing of the dissolve.
Step 5) Hit the play button again to perfect the timing EXACTLY to the music. This takes some time.
Step 6) To finesse the look further you can apply cropping, Ken Burns effect, and even video effect. Click on the image and under the clip duration box you see Video Effect. It defaults to None but when you click on it you get so many options to play with such as flipped, black & white, dream, sepia, and so many more. Once you choose the desired effect click on the cropping icon next to the microphone. On the side bar of your clip you’ll see three options Fit, Ken Burns, and Crop. I mostly chose the Ken Burns since it allows you to zoom and move the image however you want. This looks wonderful since it adds movement to the stills. When you click this effect a red and green box appears on the image. If you click on the green ‘start’ box you can control the size and placement of where the image will begin. Then you do the same for the red ‘end’ box and by overlapping or separating them you get as much movement as you would like. This is another part where you need some time to get it just the way you want.
Step 7) Now you’re ready for text. It’s best to try to be as laconic as possible. Write out a script on a piece of paper and try to remove any unneeded words. Your job here is to give your potential reader the impression and feel of the book. A brief outline of what’s in store for them and to entice them into going to your website to read more and hopefully buy. You’re trying to grab them, so the fewer words the better. Go hit the upper case T button between the camera button and the transition button. You’ll get some different placement options and text effects. Once you’ve picked the one you want drag it to the clip. Click on the clip and the text box will appear where you wanted it. Type in desired text and if you’d like to change the font, click the font button that appears above the image your working on. You’ll get some options of text, color, size, style and alignment to play with but if you want more text options you can click on System Font Panel. It’s a great idea to always include your cover, website, and planned launch date at the end. You can always go back and take the date out later to use after the launch.
Step 8 ) Watch the whole project again and perfect everything. Once it’s exactly the way you want it go up to the File button and select finalize clip. This will take about 40 minutes. Once that’s done go to the share button and select the YouTube option and upload it (you’ll need to sign up for a YouTube account before this step if you didn’t already have one). Make sure to specify if you want this clip viewed privately or publicly. Since most of us want as many people as we can to see it, most will choose the public option. Click the view option as soon as that’s done and you’ll see your original, amazing book trailer up for everyone to see!
Step 9) You want to be sure to give the specified credit under the descriptions box on YouTube for Kevin MacLeod’s music–and if you haven’t already donated to him for the clip you should do so now.
Step 10) Now it’s time to send this link out to friends and forums to get feedback if anything needs to change. Once you feel confident that it’s as fantastic as you can make it. Email it out to all your contacts, post it on your blog, send it out to guest blogs, feature it on your Facebook account and every possible place you can send it! Let this be your calling card!
So that’s it! Hopefully I made this easier for everyone–remember a special note–I’m not tech savvy and this might have been completely round-about way to do this, but I did it and if you need help follow this and it does turn out pretty awesome if I do say so myself!
Good luck to all you out there and feel free to comment here if you have any questions. I’ll try my (technologically-challenged) best to help 🙂


Great advice, Lauren! I just finished my book trailer a little while ago, I can’t wait to show it to you! (P.S. I love your blog soo much already! Wow, you got the hang of blogging fast!) I just realized the excessive amount of exclamation marks in this comment… oh well! (!!!! <– for good measure) 🙂
I can’t wait to see it! Send it ASAP!!!!
Awesome job! This would totally make me want to read your book if I hadn’t already. It inspires me to start mine even though I know it will lack your intense theme music and cool historical images that makes yours pop!
Oh I’m sure yours will be amazing too! Can’t wait to see it 🙂